Getting Started with Rancher
Overview#
Gluu Flex (“Flex”) is a cloud-native digital identity platform that enables organizations to authenticate and authorize people and software through the use of open standards like OpenID Connect, OAuth, and FIDO.
It is a downstream commercial distribution of the Linux Foundation Janssen Project software, plus two tools from Gluu: a web administration tool and a self-service web portal.
SUSE Rancher’s helm-based deployment approach simplifies the deployment and configuration of Flex, enabling organizations to take advantage of Flex’s modular design to improve their security posture while simultaneously enabling just-in-time auto-scaling.
The key services of Flex include:
-
(REQUIRED) Jans Auth Server: This component is the OAuth Authorization Server, the OpenID Connect Provider, the UMA Authorization Server for person and software authentication. This service must be Internet-facing.
-
(REQUIRED) Jans Config API: The API to configure the auth-server and other components is consolidated in this component. This service should not be Internet-facing.
-
Gluu Admin UI: Web admin tool for ad-hoc configuration.
-
Jans Fido: This component provides the server-side endpoints to enroll and validate devices that use FIDO. It provides both FIDO U2F (register, authenticate) and FIDO 2 (attestation, assertion) endpoints. This service must be Internet-facing.
-
Jans SCIM: System for Cross-domain Identity Management (SCIM) is JSON/REST API to manage user data. Use it to add, edit and update user information. This service should not be Internet-facing.
-
Jans Casa: A self-service web portal for end-users to manage authentication and authorization preferences for their account in the Gluu Flex server. Typically, it enables people to manage their MFA credentials, like FIDO tokens and OTP authenticators. It's also extensible if your organization has any other self-service requirements.
Building Blocks#

Scope#
In this Quickstart Guide, we will:
- Deploy Flex and add some users
- Enable two-factor authentication
- Protect content on an Apache web server with OpenID Connect.
Audience#
This document is intended for DevOps engineers, site reliability engineers (SREs), platform engineers, software engineers, and developers who are responsible for managing and running stateful workloads in Kubernetes clusters.
Technical overview#

In addition to the core services listed in the Introduction above, the SUSE Rancher deployment includes the following components:
PostgreSQL/MySQL: SQL database dialect used to store configuration, people clients, sessions and other data needed forGluu Flexoperation.Cert Manager: Used for managing X.509 certificates and crypto keys lifecycle in Janssen Server.Key Rotation: A cronjob that implementsCert Managerto rotate the auth keysConfiguration job: This job loads (generate/restore) and dumps (backup) the configuration and secrets.ConfigMap: Stores configuration about Flex environment setup.Secrets: Contains sensitive or confidential data such as a password, a token, or a key.Persistence job: This job loads initial data for LDAP or Couchbase.
Config and Secret keys#
The Configuration job creates a set of configurations and secrets used by all services in the Flex setup.
To check the values of the configuration keys(configmaps) in the installation:
kubectl get cm cn -o json -n <namespace>
To check the values of the secret keys in installation:
kubectl get secret cn -o json -n <namespace>
Gluu Config Keys#
| Key | Example Values |
|---|---|
admin_email |
support@gluu.org |
admin_inum |
d3afef58-c026-4514-9d4c-e0a3efb4c29d |
admin_ui_client_id |
1901.a6575c1e-4688-4c11-8c95-d9e570b13ee8 |
auth_enc_keys |
RSA1_5 RSA-OAEP |
auth_key_rotated_at |
1653517558 |
auth_legacyIdTokenClaims |
false |
auth_openidScopeBackwardCompatibility |
false |
auth_openid_jks_fn |
/etc/certs/auth-keys.jks |
auth_openid_jwks_fn |
/etc/certs/auth-keys.json |
casa_client_id |
0008-db36db1f-025e-4164-aeed-f82df064eee8 |
auth_sig_keys |
RS256 RS384 RS512 ES256 ES384 ES512 PS384 PS512 |
city |
Austin |
country_code |
US |
default_openid_jks_dn_name |
CN=Janssen Auth CA Certificate |
fido2ConfigFolder |
/etc/jans/conf/fido2 |
hostname |
demoexample.gluu.org |
jca_client_id |
1801.4df6c3ba-ebf6-4836-8fb5-6da927586f61 |
optional_scopes |
[\"casa\", \"sql\", \"fido2\", \"scim\"] |
orgName |
Gluu |
tui_client_id |
2000.9313cd4b-147c-4a67-96be-8a69ddbaf7e9 |
scim_client_id |
1201.1cbcc731-3fca-4668-a480-1b5f5a7d6a53 |
state |
TX |
token_server_admin_ui_client_id |
1901.57a858dc-69f3-4967-befe-e089fe376638 |
Gluu Secret Keys#
| Key | Example Values |
|---|---|
admin_ui_client_encoded_pw |
QlBMMTZUZWVYeWczVlpNUk1XN0pzdzrg |
admin_ui_client_pw |
WnJYZEcyVlNBWG9d |
auth_jks_base64 |
xxxxxxxxxxxxxxxxxxxxxxxxxxxxxxxxxxxxxx |
auth_openid_jks_pass |
TWZoR3Rlb0NnUHEP |
auth_openid_key_base64 |
xxxxxxxxxxxxxxxxxxxxxxxxxxxxxxxxxxxxxx |
casa_client_encoded_pw |
b3NabG9oVGNncFVVWFpxNEJMU3V0dzrg |
casa_client_pw |
M1g0Z1dEbGNPQ19d |
encoded_admin_password |
e3NzaGF9eGpOaDRyblU3dzJZbmpPclovMUlheTdkR0RrOTdLe |
encoded_salt |
Um9NSEJnOU9IbTRvRkJHVVZETVZIeXEP |
jca_client_encoded_pw |
Um9NSEJnOU9IbTRvRkJHVVZETVZIeX58 |
jca_client_pw |
Um9NSEJnOU9IbTRvR |
otp_configuration |
xxxxxxxxxxxxxxxxxxxxxxxxxxxxxxxxxxxxxx |
pairwiseCalculationKey |
ZHd2VW01Y3VOUW6638ZHd2VW |
pairwiseCalculationSalt |
ZHd2VW01Y3VOUW6638ZHd2VW0 |
plugins_admin_ui_properties |
xxxxxxxxxxxxxxxxxxxxxxxxxxxxxxxxxxxxxx |
tui_client_encoded_pw |
ZHd2VW01Y3VOUW66388PS512 |
tui_client_pw |
AusZHd2VW01Y3VOUW6638 |
scim_client_encoded_pw |
UZHd2VW01Y3VOUW6638ZHd2VW01Y3VOUW6638 |
scim_client_pw |
ZHd2VW01Y3VOUW6638 |
sql_password |
ZHd2VW01Y3V638 |
ssl_ca_cert |
xxxxxxxxxxxxxxxxxxxxxxxxxxxxxxxxxxxxxx |
ssl_ca_key |
xxxxxxxxxxxxxxxxxxxxxxxxxxxxxxxxxxxxxx |
ssl_cert |
xxxxxxxxxxxxxxxxxxxxxxxxxxxxxxxxxxxxxx |
ssl_csr |
xxxxxxxxxxxxxxxxxxxxxxxxxxxxxxxxxxxxxx |
ssl_key |
xxxxxxxxxxxxxxxxxxxxxxxxxxxxxxxxxxxxxx |
super_gluu_creds |
xxxxxxxxxxxxxxxxxxxxxxxxxxxxxxxxxxxxxx3 |
token_server_admin_ui_client_encoded_pw |
Q1Z1cmtYWUlYSVg4U2tLTldVcnZVTUF |
token_server_admin_ui_client_pw |
ZHd2VW01Y3VOUW6638 |
Prerequisites#
-
SUSE Rancher installed with an accessible UI
-
Kubernetes cluster running on SUSE Rancher with at least 1 worker node
-
Sufficient RBAC permissions to deploy and manage applications in the cluster.
-
LinuxIO kernel modules on the worker nodes
-
Docker running locally (Linux preferred)
-
Essential tools and CLI utilities installed on your local workstation and are available in your
$PATH:curl,kubectl -
An entry in the
/etc/hostsfile of your local workstation to resolve the hostname of the Gluu Flex installation. This step is for testing purposes.
Installation#
Summary of steps:
-
Install Database:
Note
For the
Database test setupto work, a PV provisioner support must be present in the underlying infrastructure.Install PostgreSQL database#
Note
If you are willing to use MySQL installation, skip this section and head to the Install MySQL section.
To install a quick setup with
PostgreSQLas the backend, you need to provide the connection parameters of a fresh setup. For a test setup, you can follow the below instructions:Apps-->Chartsand search forPostgres.- Click on
Installon the right side of the window. - Create a new namespace called
postgresand hitNext. - You should be on the
Edit YAMLpage. Modify the below keys as desired. These values will be inputted in the installation ofGluu Flex
Key auth.databaseauth.usernameauth.password- Click
Installat the bottom right of the page.
Install MySQL database#
Note
Skip this section if you installed PostgreSQL. This section is only needed if you are willing to use MySQL.
To install a quick setup with
MySQLas the backend, you need to provide the connection parameters of a fresh setup. For a test setup, you can follow the below instructions:- Open a kubectl shell from the top right navigation menu
>_. - Run:
helm repo add bitnami https://charts.bitnami.com/bitnami helm repo update kubectl create ns gluu #Create gluu namespace -
Pass in a custom password for the database. Here we used
Test1234#. The admin user will be left asroot. Notice we are installing in thegluunamespace. Runhelm install my-release --set auth.rootPassword=Test1234#,auth.database=jans bitnami/mysql -n gluu
Successful Installation#
After the installation is successful, you should have a
Statefulsetactive in the rancher UI as shown in the screenshot below.
-
Install Nginx-Ingress, if you are not using Istio ingress
helm repo add ingress-nginx https://kubernetes.github.io/ingress-nginx
helm repo add stable https://charts.helm.sh/stable
helm repo update
helm install nginx ingress-nginx/ingress-nginx
To get the Loadbalancer IP:
kubectl get svc nginx-ingress-nginx-controller --output jsonpath='{.status.loadBalancer.ingress[0].ip}' -
Install Gluu Flex:
- Head to
Apps-->Chartsand search forGluu - Click on
Installon the right side of the window. - Change the namespace from
defaulttogluu, then click onNext. - Scroll through the sections to get familiar with the options. For minimal setup follow with the next instructions.
- Add
License SSA. Before initiating the setup, please contact Gluu to obtain a valid license or trial license. Your organization needs to register with Gluu to trial Flex, after which you are issued a JWT placed here in which you can use to install. This must be base64 encoded. - Click on the
Persistencesection. ChangeSQL database host uritopostgresql.postgres.svc.cluster.localin the case ofPostgreSQLormy-release-mysql.gluu.svc.cluster.localin the case ofMySQL. Also setSQL database username,SQL password, andSQL database nameto the values you used during the database installation. - To enable Casa and the Admin UI, navigate to the
Optional Servicessection and check theEnable casaandboolean flag to enable admin UIboxes. You can also enable different services likeClient APIandJackrabbit. - Click on the section named
Ingressand enable all the endpoints. You might add LB IP or address if you don't haveFQDNforGluu. - To pass your
FQDNorDomainthat is intended to serve the Gluu Flex IDP, head to theConfigurationsection:- Add your
FQDNand check the boxIs the FQDN globally resolvable. - Click on the
Edit YAMLtab and add yourFQDNtonginx-ingress.ingress.hostsandnginx-ingress.ingress.tls.hosts.
- Add your
- Click on
Installon the bottom right of the window.
Note
You can upgrade your installation after the deployment. To do that, go to the SUSE Rancher Dashboard -> Apps -> Installed Apps -> gluu -> Click on the 3 dots on the right -> Upgrade -> Make your changes -> Click Update.
- Head to
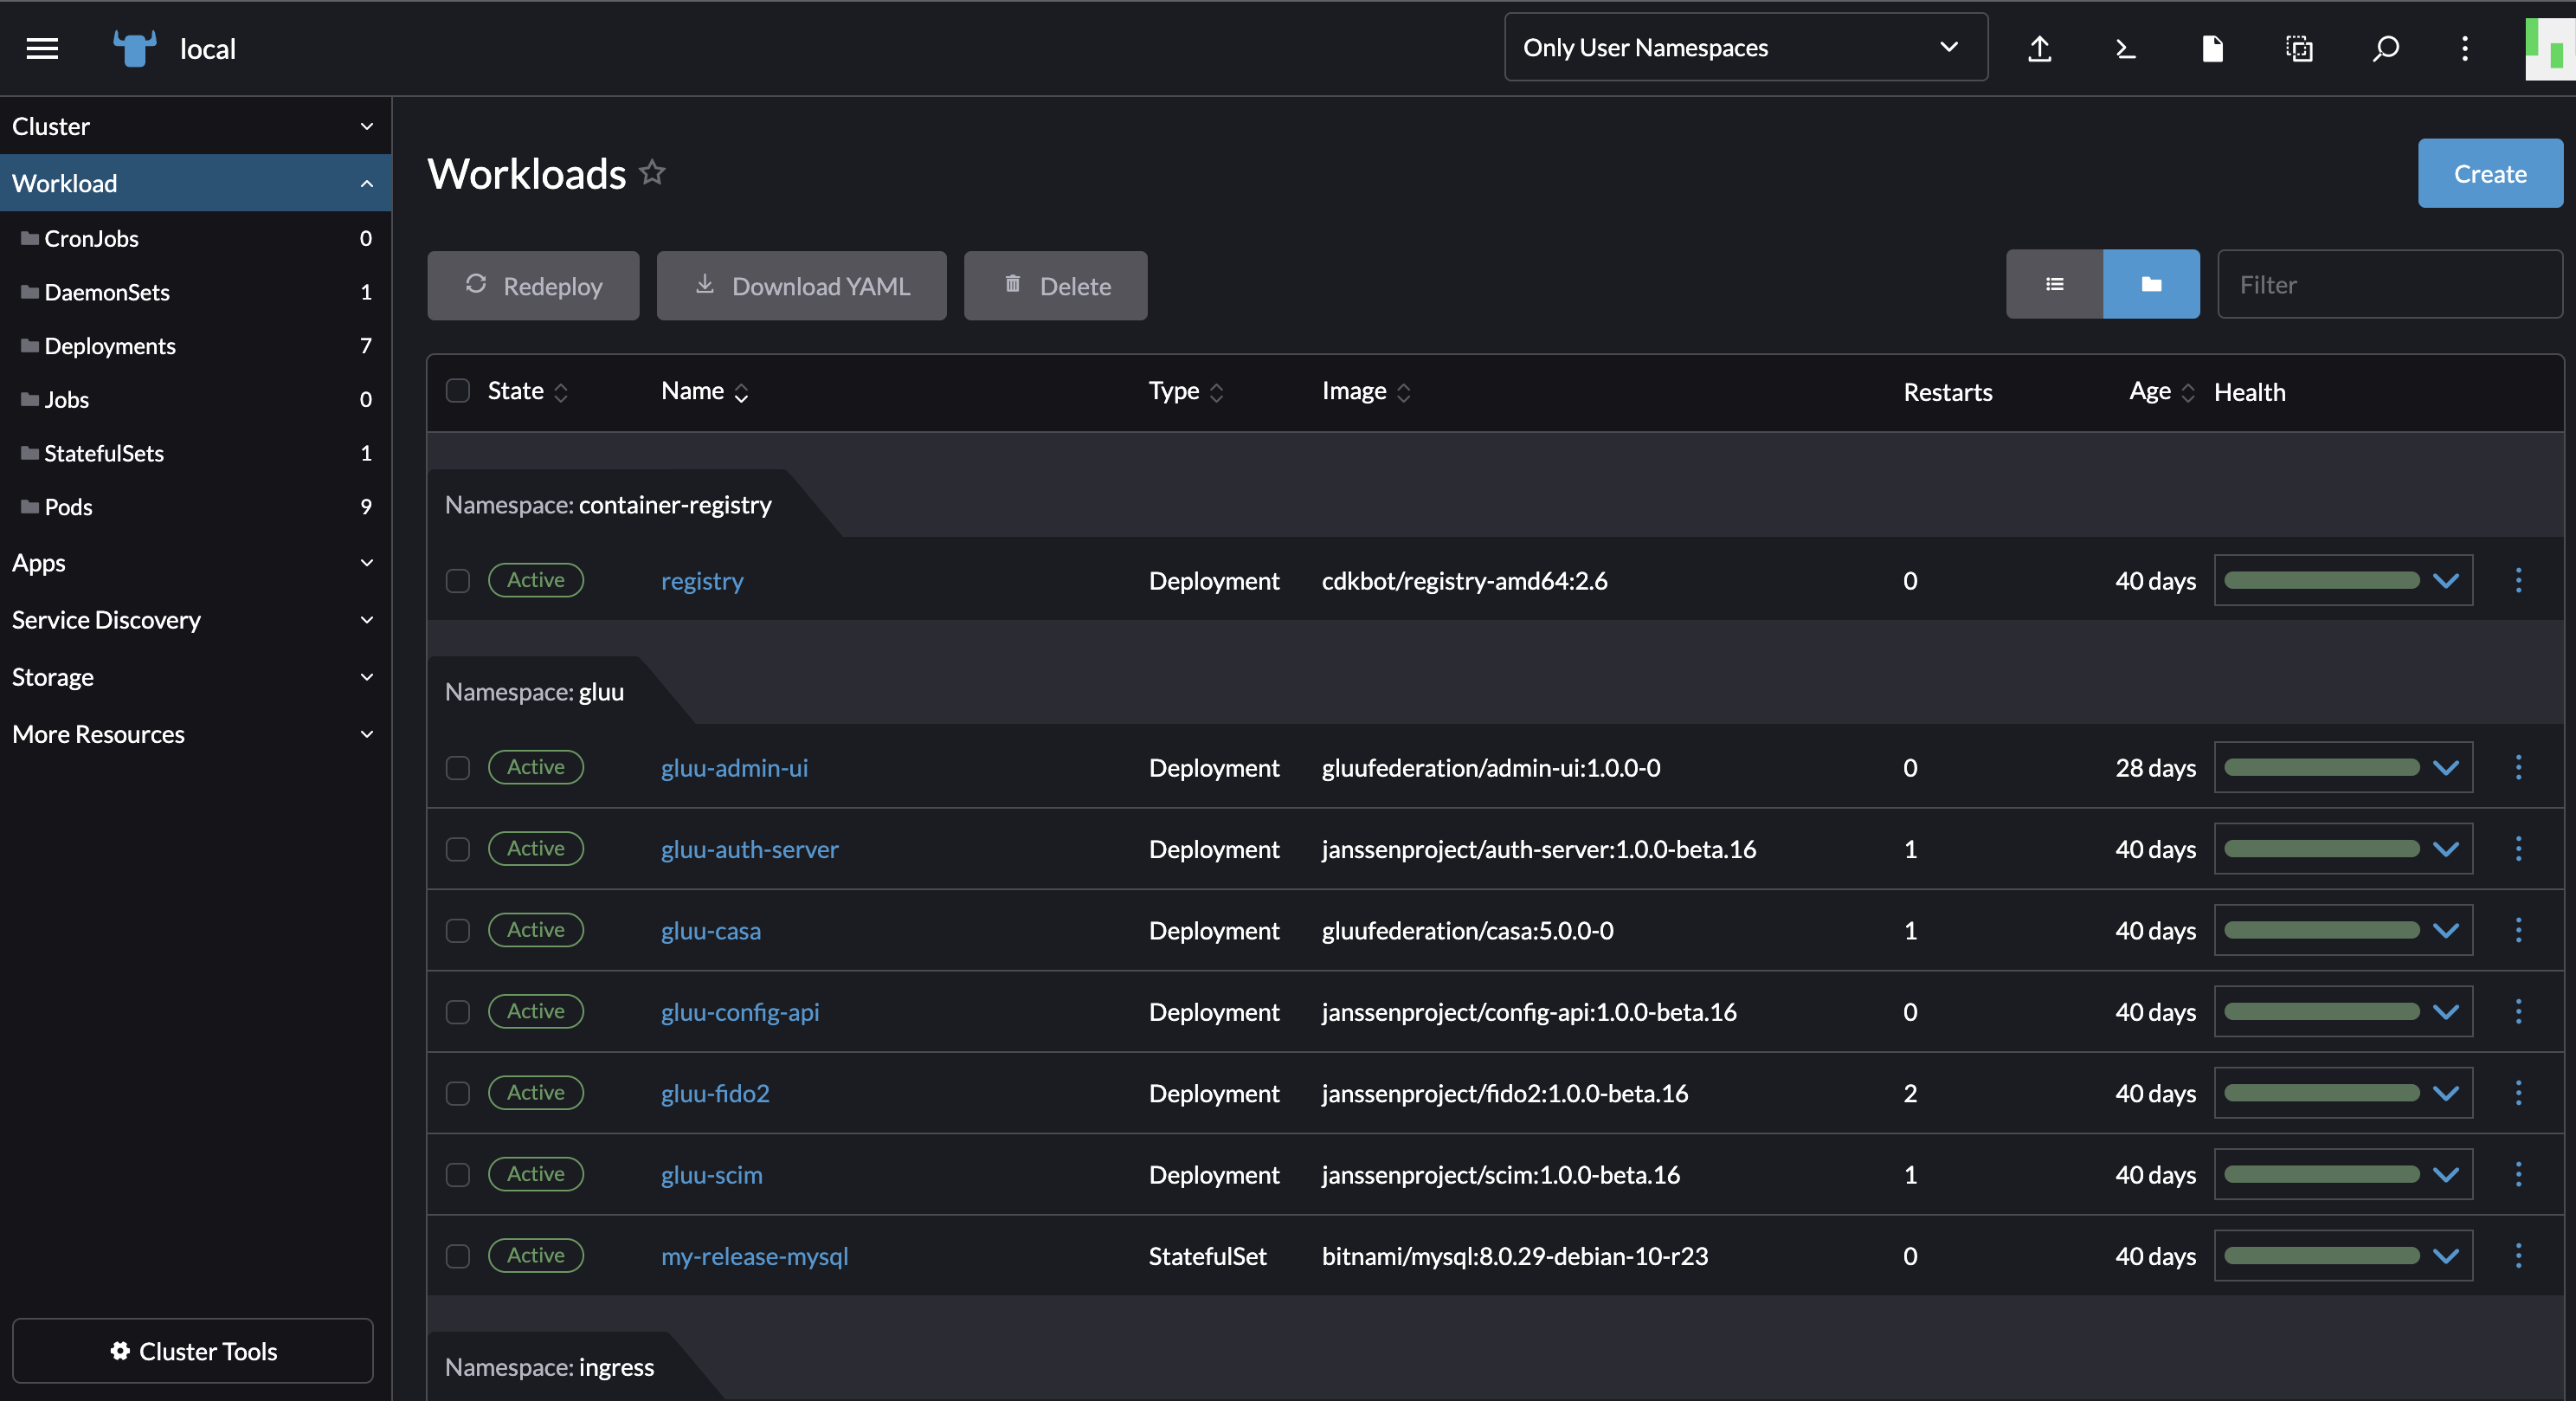
The running deployment and services of different Gluu Flex components like casa, admin-ui, scim, auth-server, etc can be viewed by navigating through the SUSE Rancher. Go to Workloads and see the running pods. Go under Service Discovery and checkout the Ingresses and Services. All deployed components should be in a healthy and running state like in the screenshot shown below.
Connecting to the Setup#
Note
You can skip this section if you have a globally resolvable FQDN.
In the event you used microk8s or your fqdn is not registered, the below steps will help with connecting to your setup.
-
To access the setup from a browser or another VM, we need to change the ingress class annotation from
kubernetes.io/ingress.class: nginxtokubernetes.io/ingress.class: publice.g., for the specific component you want to access publicly in the browser;- Navigate through the SUSE Rancher UI to
Service Discovery->Ingresses - Choose the
ingressfor the targeted component. For examplegluu-nginx-ingress-auth-serverforauth-server - Click on the three dots in the top right corner
- Click on
Edit Yaml - On line 8, change the
kubernetes.io/ingress.classannotation value fromnginxtopublic - Click
Save

- Navigate through the SUSE Rancher UI to
-
The
LoadBalancer IPneeds to get mapped inside/etc/hostswith the domain chosen forgluu flex. If the domain you used in the setup is demoexample.gluu.org:3.65.27.95 demoexample.gluu.org -
You can do the same edit for every each component you want to access publicly from the browser.
Testing Configuration endpoints#
-
Try accessing some Gluu Flex endpoints like
https://demoexample.gluu.org/.well-known/openid-configurationin the browser and you'll get back a JSON response;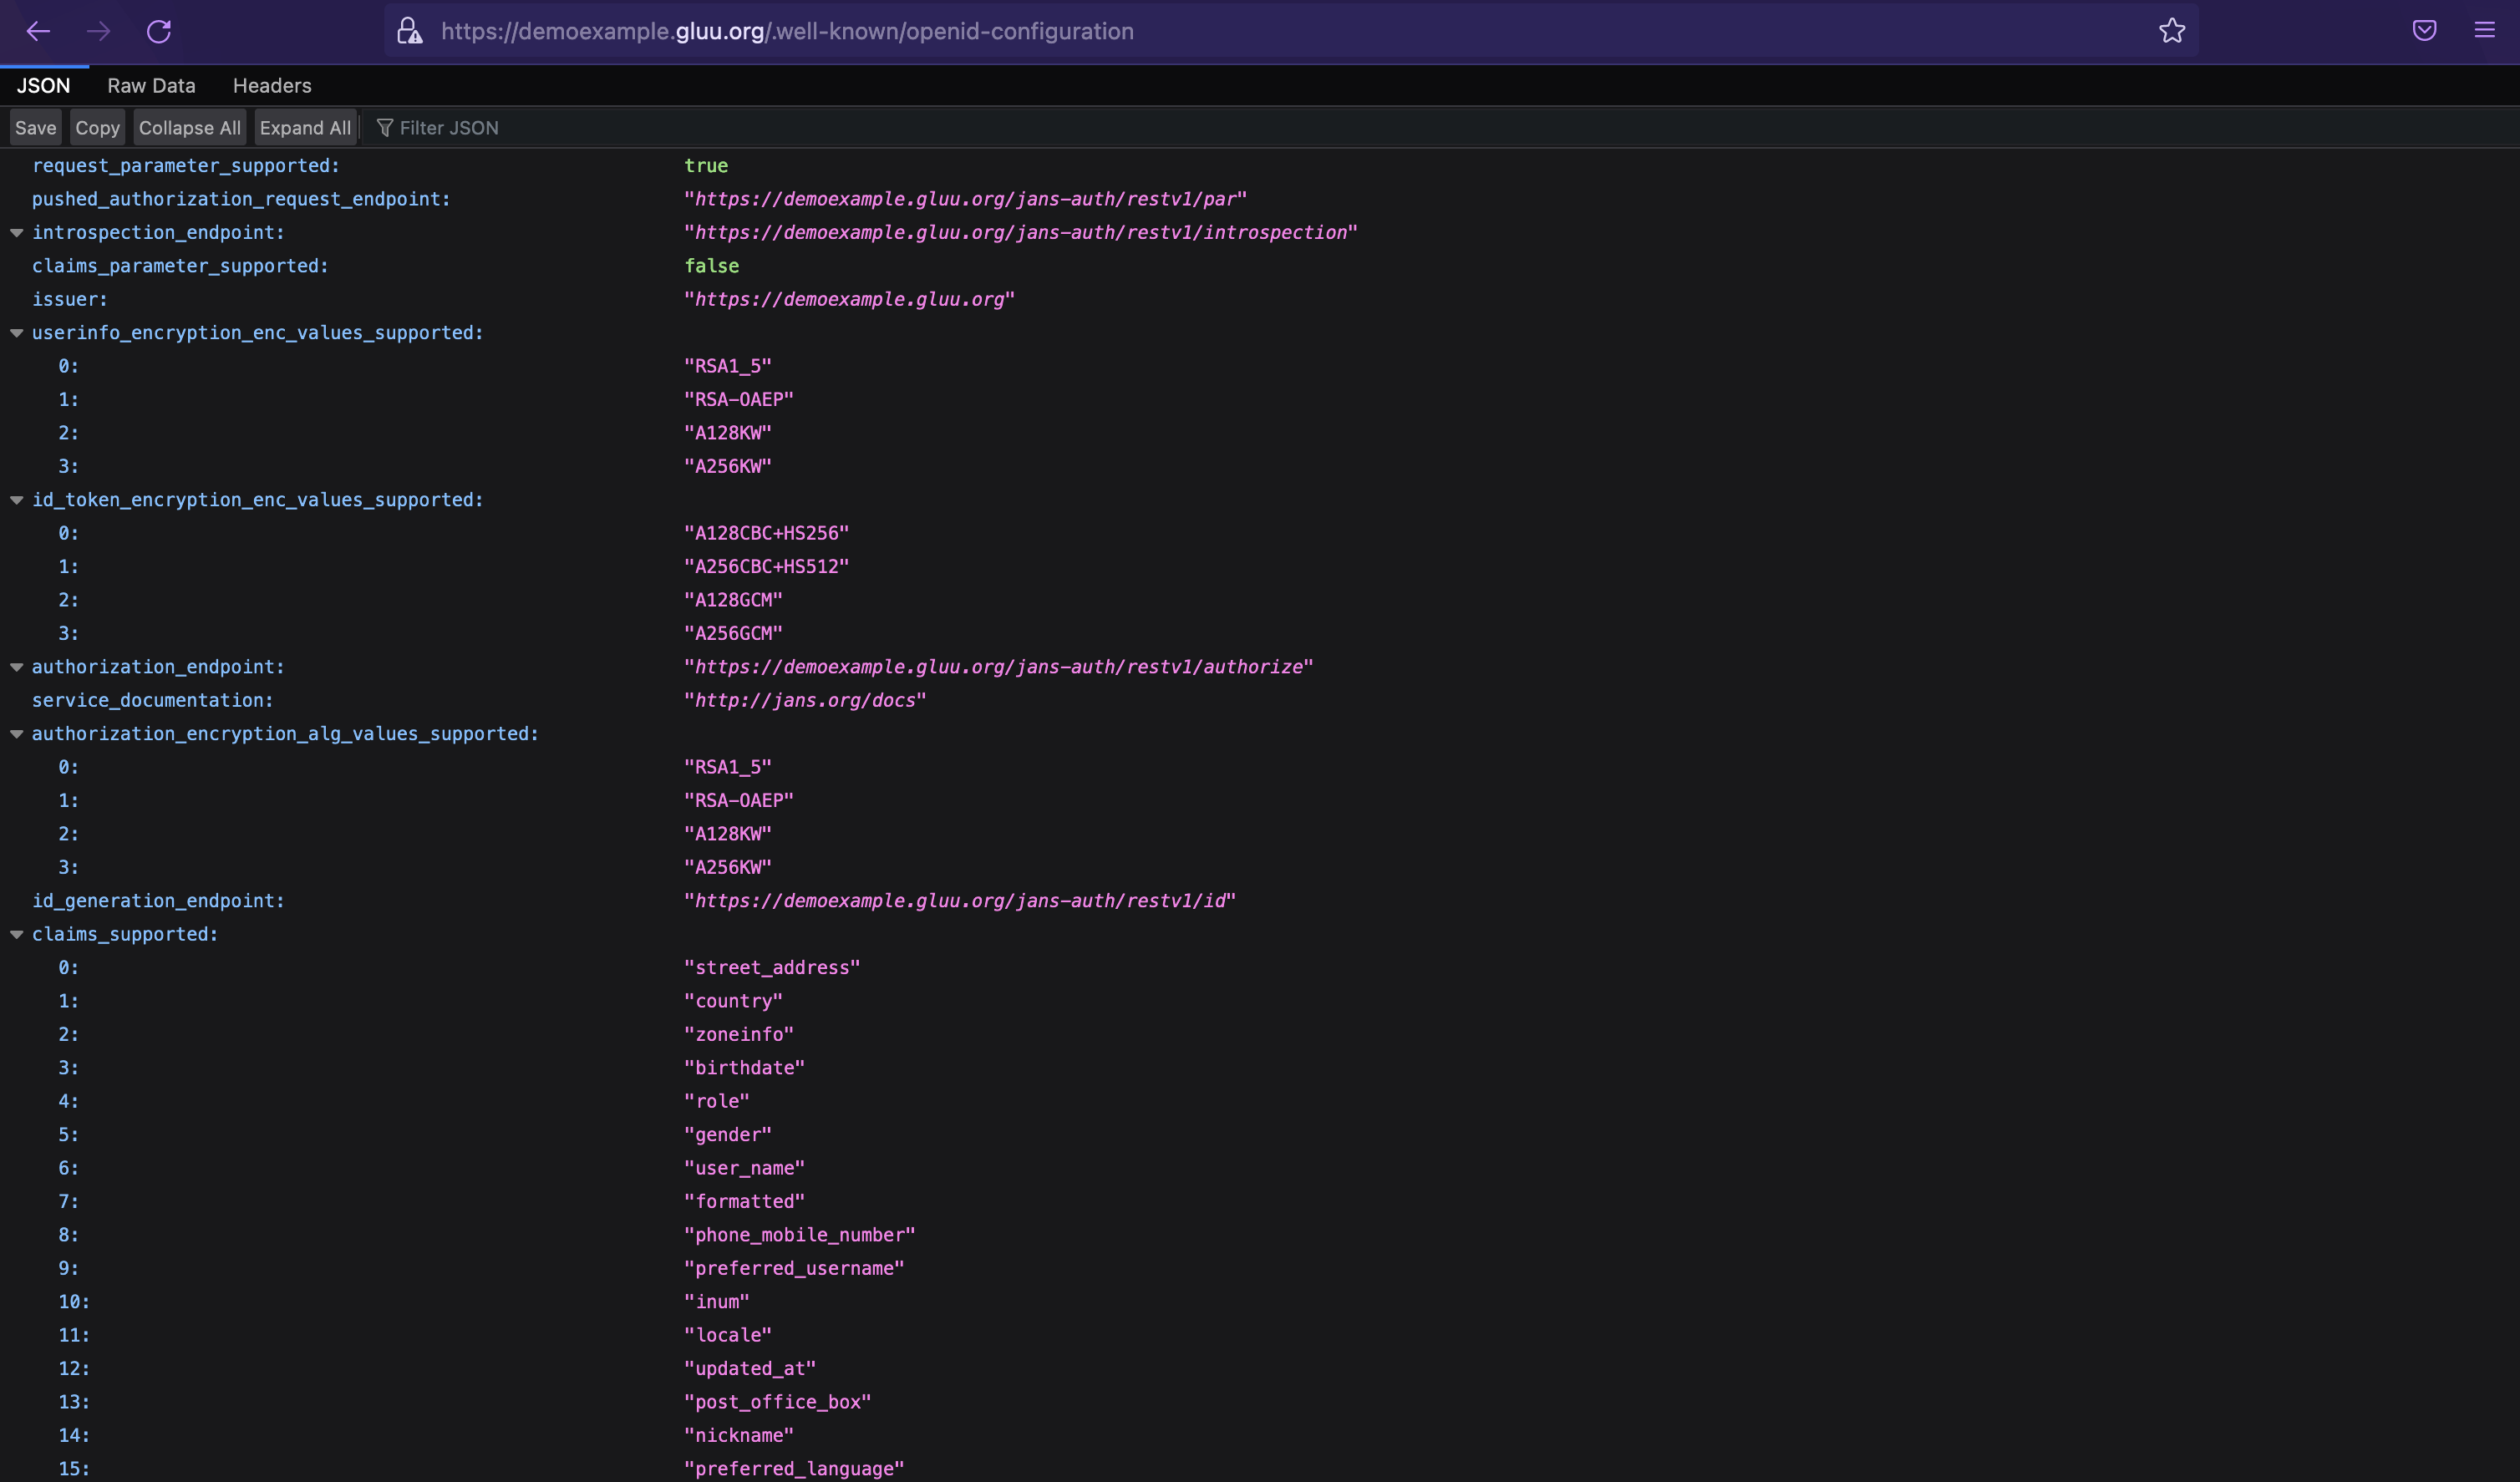
-
Note that you can also access those endpoints via curl command, E.g.
curl -k https://demoexample.gluu.org/.well-known/openid-configurationYou should get a similar response like the one below;
{"version":"1.1","issuer":"https://demoexample.gluu.org","attestation":{"base_path":"https://demoexample.gluu.org/jans-fido2/restv1/attestation","options_enpoint":"https://demoexample.gluu.org/jans-fido2/restv1/attestation/options","result_enpoint":"https://demoexample.gluu.org/jans-fido2/restv1/attestation/result"},"assertion":{"base_path":"https://demoexample.gluu.org/jans-fido2/restv1/assertion","options_enpoint":"https://demoexample.gluu.org/jans-fido2/restv1/assertion/options","result_enpoint":"https://demoexample.gluu.org/jans-fido2/restv1/assertion/result"}}
Testing Admin UI#
-
Go to the browser and open https://demoexample.gluu.org/admin which should load the Admin UI license page.
You would need to provide 4 keys to get access the Admin UI as shown in the screenshot below. Reach out to support management of Gluu on how to acquire the license keys which have an expiry date but can be renewed.
- API Key
- Product Code
- Shared Key
- Management Key
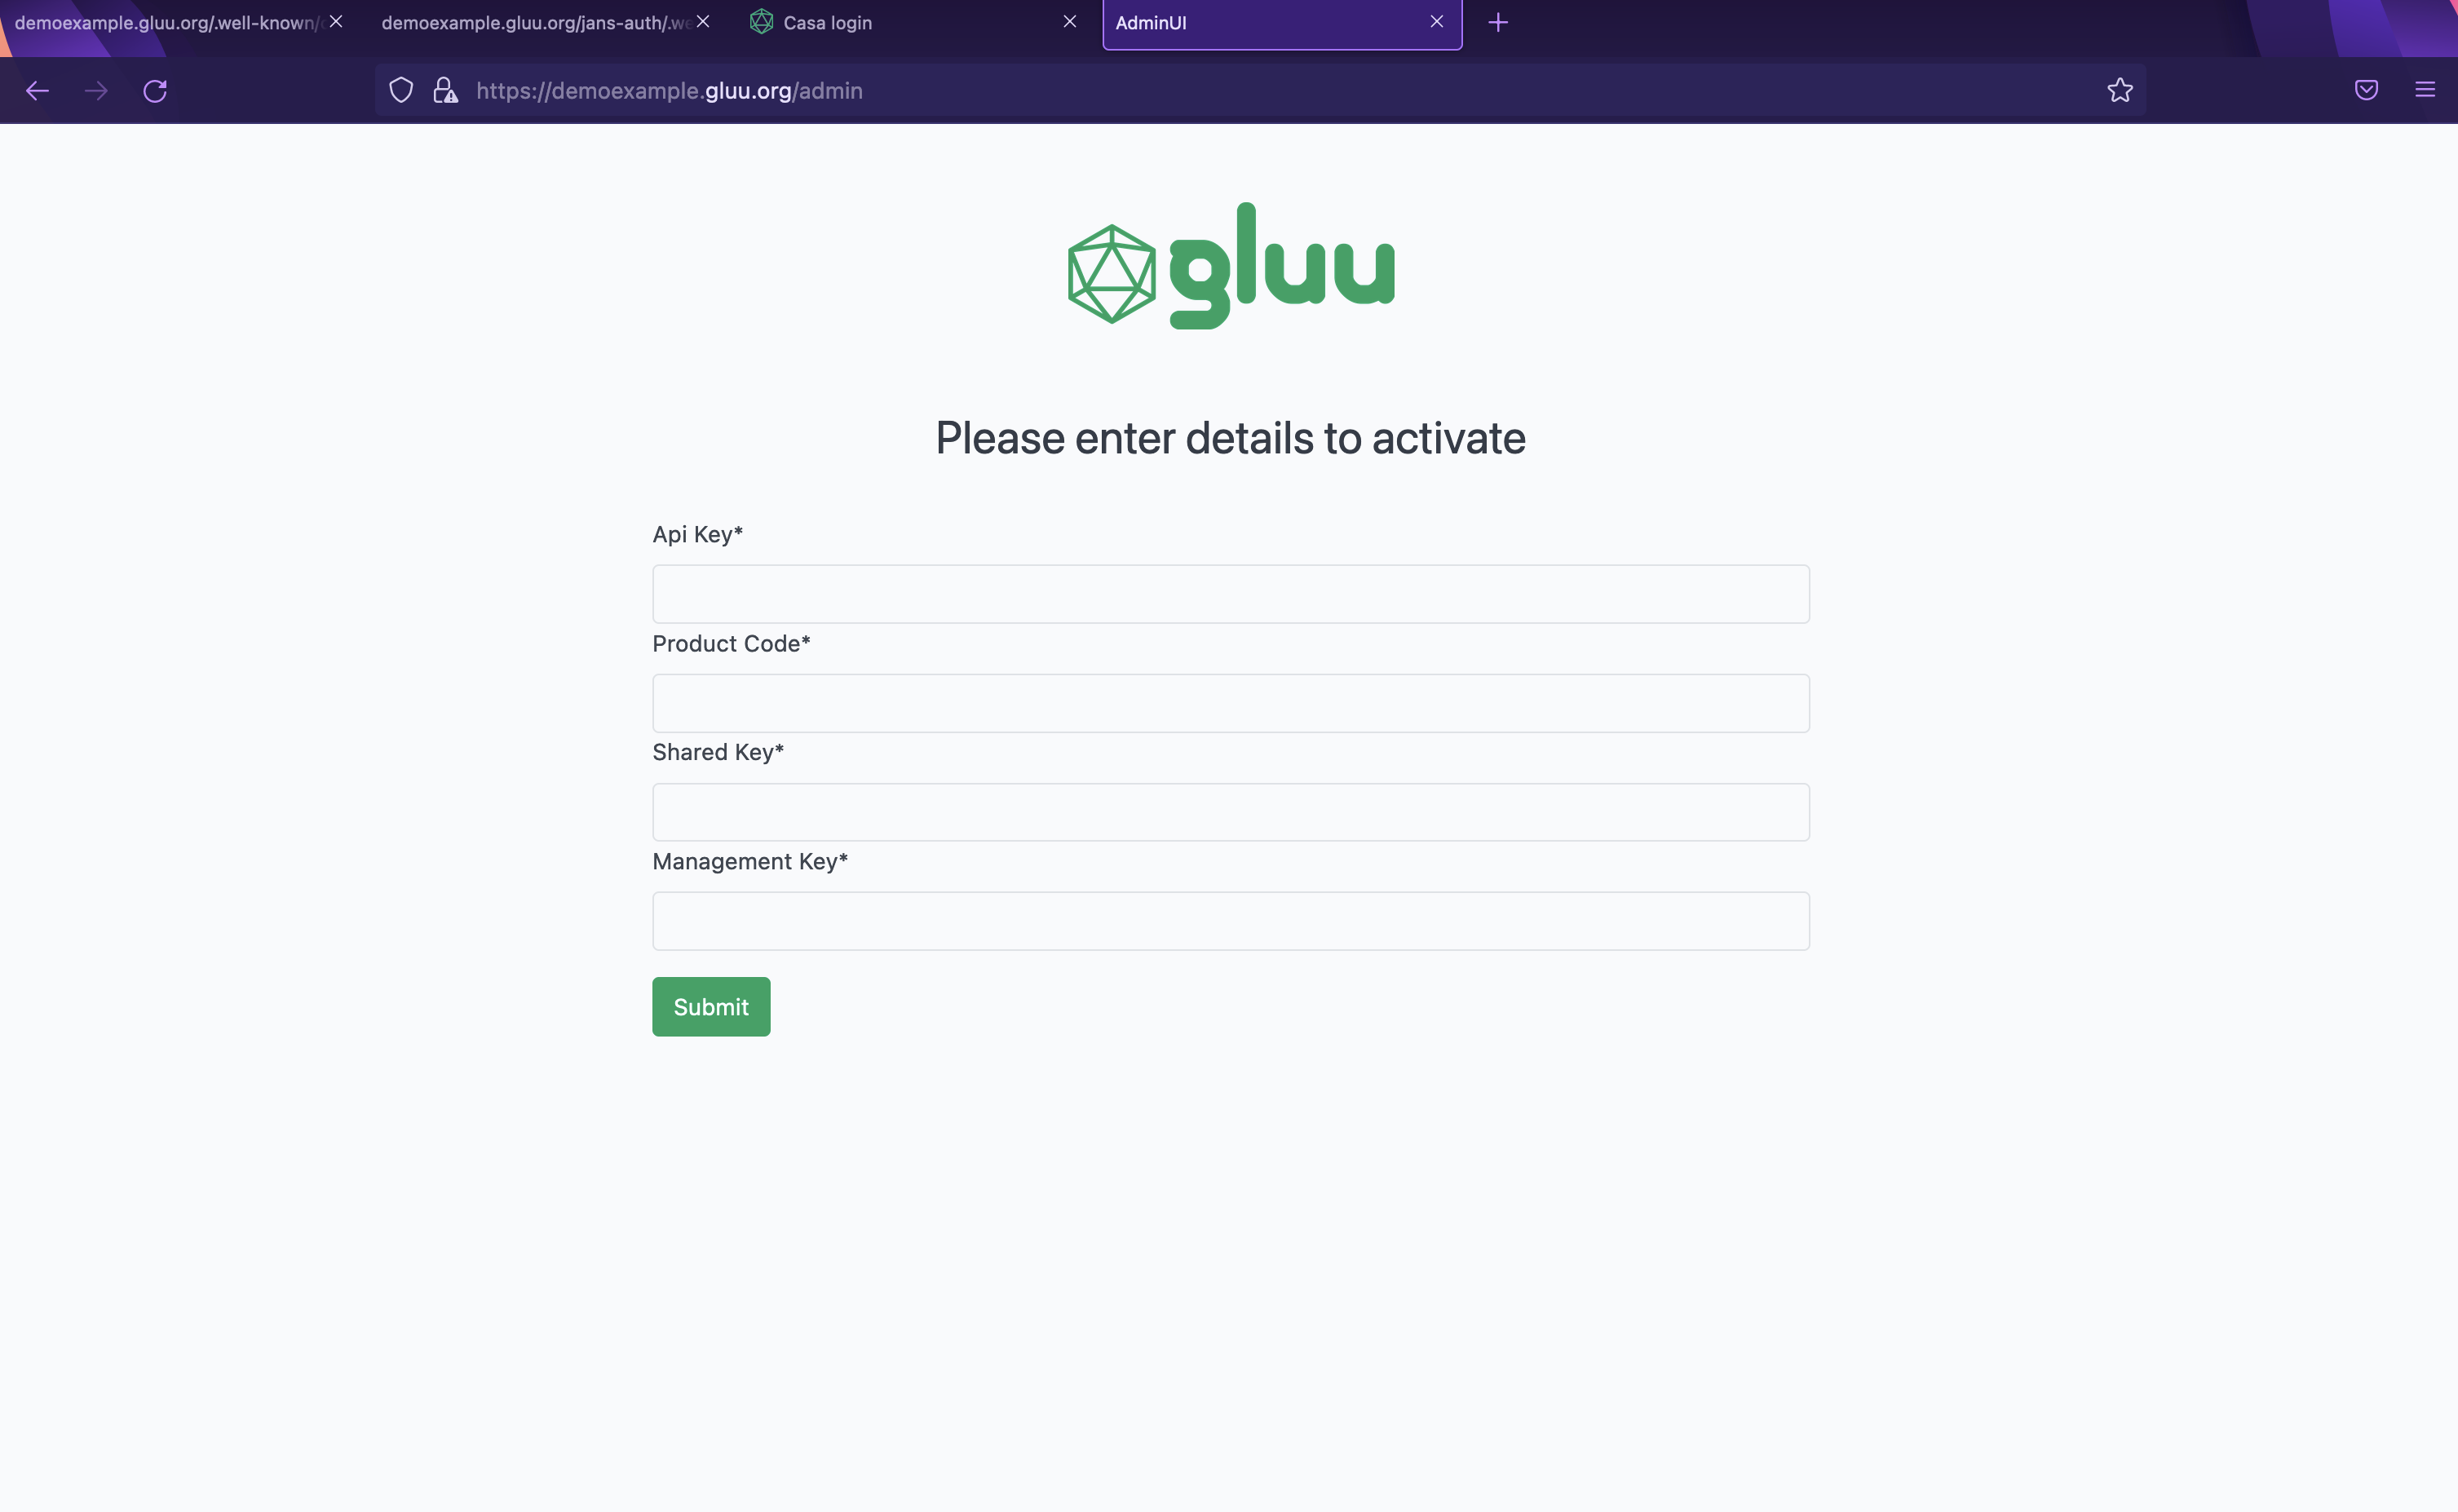
Reach out if you need test-keys that you can test with.
Login and Add a New User.#
After inputting the license keys, you can then use admin and the password you set to login to the Admin UI and you should see the Admin UI dashboard.
-
You could also add another test user via the admin UI that will be used for testing Casa and 2FA as shown in the screenshot below.
Navigate to
Usersand click on+in the top right corner to add a user.
Testing Casa#
Jans Casa ("Casa") is a self-service web portal for managing account security preferences. The primary use case for Casa is self-service 2FA, but other use cases and functionalities can be supported via Casa plugins.
Although you have not enabled two-factor authentication yet, you should still be able to login to Casa as the admin user and the password is the one you set during installation.
-
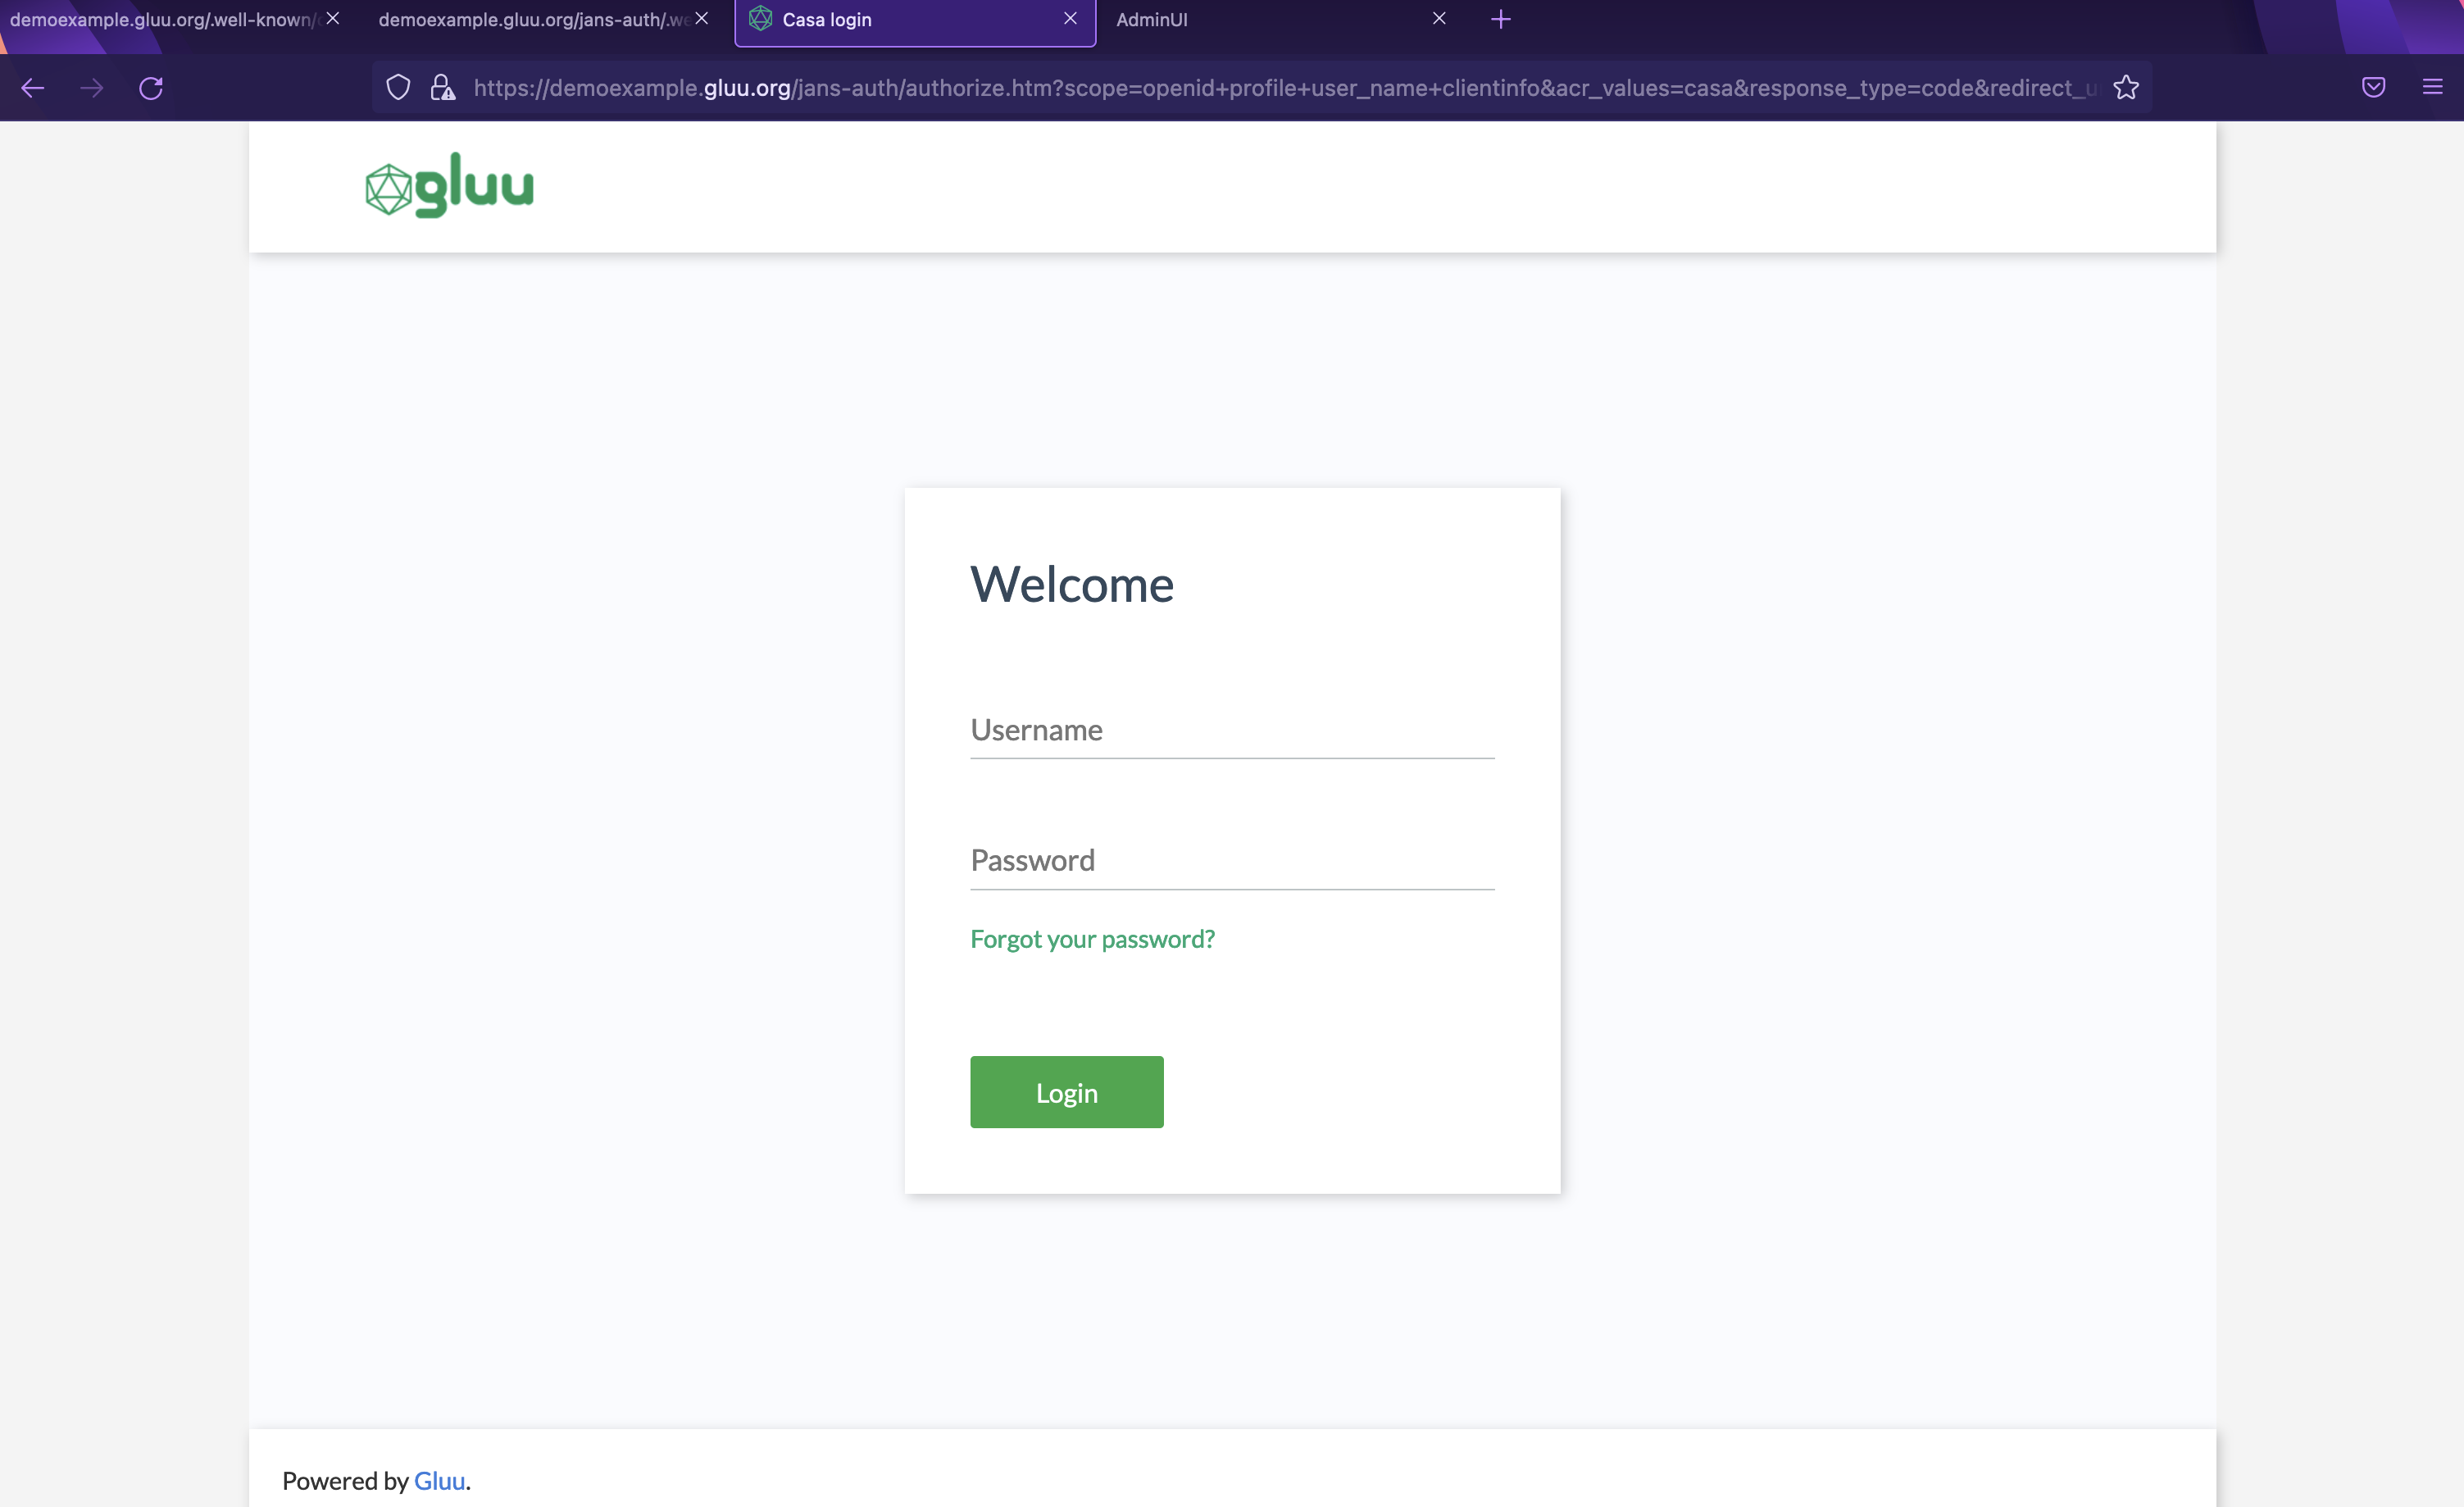
Point your browser to https://demoexample.gluu.org/jans-casa and you should be welcomed by the Casa login page as shown below.
-
After logging in, you'll be welcomed by the home page as shown below.

Enabling Two Factor Authentication#
In this part, we are going to enable two standard authentication mechanisms: OTP and FIDO.
This can be done through the admin UI. 2FA can be turned on by clicking the switch in the Second Factor Authentication widget. By default, you will be able to choose from a few 2FA policies:
- Always (upon every login attempt)
- If the location (e.g. city) detected in the login attempt is unrecognized
- If the device used to login is unrecognized
To reduce the chance of account lockout, enroll at least two different types of 2FA credentials -- e.g. one security key and one OTP app; or one OTP app and one SMS phone number, etc. This way, regardless of which device you're using to access a protected resource, you will have a usable option for passing strong authentication.
To enable 2FA, firstly the OTP and FIDO components have to be enabled in the Casa admin UI then login to Casa as an end user, and register an OTP device (i.e. Google Authenticator) and a FIDO device.
Register OTP device
- To add a new OTP token, navigate to 2FA credentials > OTP Tokens.
- You can either add a soft OTP token by choosing the
Soft tokenoption or a hard token by choosing theHard TokenOption - Check the soft OTP token and click ready
- Before proceeding to the next step, Download Google Authenticator from Google Play or Appstore
- Then proceed and scan the QR code with your app

- Enter the 6-digit code that appears in your authenticator app and validate the enrollment.
Register Fido device
- To add a new FIDO 2 credential, navigate to
2FA credentials>Security Keys and built-in Platform AuthenticatorsInsert the fido key and click Ready. Casa will prompt you to press the button on the key.

- Add a nickname and click Add. Once added, the new device will appear in a list on the same page. Click the pencil to edit the device's nickname
Testing Apache OIDC Locally#
In this part, we are going to use docker to locally configure an apache web server, and then install the mod_auth_openidc module and configure it accordingly.
Using local docker containers, our approach is to first register a client, then spin up two Apache containers, one serving static content (with server-side includes configured so we can display headers and environment information), and one acting as the OpenID Connect authenticating reverse proxy.
Register an OpenID Connect client#
On the Janssen server, you can register a new client in the Flex Admin UI or the jans-cli. In this section, we are going to show both ways of doing it from the Admin UI and using jans-cli
Admin UI#
- Navigate to
Auth server->Clientsand click on+in the top right corner to create a client.
Take note of the following keys:values because they configure the right client that we need
scopes: email_,openid_,profile
responseTypes: code
The screenshot below shows an example of the Admin UI section from where a client is created

Jans TUI#
On the Janssen server, we are going to register a new client using the jans-cli. There are two ways you can register an OIDC client with the Janssen server, Manual Client Registration and Dynamic Client Registration (DCR).
Here we will use manual client registration. We will use jans-tui tool provided by the Janssen server. jans-tui has a menu-driven interface that makes it easy to configure the Janssen server. Here we will use the menu-driven approach to register a new client.
Download or build config-cli-tui then:
- Get the tui client id and secret:
 FQDN= #Add your FQDN here
 TUI_CLIENT_ID=$(kubectl get cm cn -n <namespace> --template={{.data.tui_client_id}})
 TUI_CLIENT_SECRET=$(kubectl get secret cn -n <namespace> --template={{.data.tui_client_pw}} | base64 -d)
`./config-cli-tui.pyz --host <FQDN> --client-id <TUI_CLIENT_ID> --client-secret <TUI_CLIENT_SECRET> --no-tui --schema /components/schemas/Client`
-
Add values for required params and store this JSON in a text file. Take keynote of the following properties.
schema-json-file.json{ "dn": null, "inum": null, "displayName": "<name-of-choice>", "clientSecret": "<secret-of-your-choice>", "frontChannelLogoutUri": null, "frontChannelLogoutSessionRequired": null, "registrationAccessToken": null, "clientIdIssuedAt": null, "clientSecretExpiresAt": null, "redirectUris": [ "<your-uri-here>" ], "claimRedirectUris": null, "responseTypes": [ "code" ], "grantTypes": [ "authorization_code" ], "applicationType": "web", "contacts": null, "idTokenTokenBindingCnf": null, "logoUri": null, "clientUri": null, "policyUri": null, "tosUri": null, "jwksUri": null, "jwks": null, "sectorIdentifierUri": null, "subjectType": "public", "idTokenSignedResponseAlg": null, "idTokenEncryptedResponseAlg": null, "idTokenEncryptedResponseEnc": null, "userInfoSignedResponseAlg": null, "userInfoEncryptedResponseAlg": null, "userInfoEncryptedResponseEnc": null, "requestObjectSigningAlg": null, "requestObjectEncryptionAlg": null, "requestObjectEncryptionEnc": null, "tokenEndpointAuthMethod": "client_secret_basic", "tokenEndpointAuthSigningAlg": null, "defaultMaxAge": null, "requireAuthTime": null, "defaultAcrValues": null, "initiateLoginUri": null, "postLogoutRedirectUris": null, "requestUris": null, "scopes": [ "email", "openid", "profile" ], "claims": null, "trustedClient": false, "lastAccessTime": null, "lastLogonTime": null, "persistClientAuthorizations": null, "includeClaimsInIdToken": false, "refreshTokenLifetime": null, "accessTokenLifetime": null, "customAttributes": null, "customObjectClasses": null, "rptAsJwt": null, "accessTokenAsJwt": null, "accessTokenSigningAlg": null, "disabled": false, "authorizedOrigins": null, "softwareId": null, "softwareVersion": null, "softwareStatement": null, "attributes": null, "backchannelTokenDeliveryMode": null, "backchannelClientNotificationEndpoint": null, "backchannelAuthenticationRequestSigningAlg": null, "backchannelUserCodeParameter": null, "expirationDate": null, "deletable": false, "jansId": null, "description": null } -
Now you can use that JSON file as input to the command below and register your client
./config-cli-tui.pyz --host <FQDN> --client-id <TUI_CLIENT_ID> --client-secret <TUI_CLIENT_SECRET> --no-tui --operation-id=post-oauth-openid-client --data <path>/schema-json-file.json -
After the client is successfully registered, there will be data that describes the newly registered client. Some of these values, like
inumandclientSecret, will be required before we configuremod_auth_openidcSo keep in mind that we shall get back to this.
Create an Application Container#
An application docker container will be run locally which will act as the protected resource (PR) / external application. The following files have code for the small application. We shall create a directory locally / on your machine called test and add the required files.
- Firstly create a project folder named
testby runningmkdir test && cd testand add the following files with their content;
app.conf
ServerRoot "/usr/local/apache2"
Listen 80

LoadModule mpm_event_module modules/mod_mpm_event.so
LoadModule authz_core_module modules/mod_authz_core.so
LoadModule include_module modules/mod_include.so
LoadModule filter_module modules/mod_filter.so
LoadModule mime_module modules/mod_mime.so
LoadModule log_config_module modules/mod_log_config.so
LoadModule setenvif_module modules/mod_setenvif.so
LoadModule unixd_module modules/mod_unixd.so
LoadModule dir_module modules/mod_dir.so

User daemon
Group daemon

<Directory />
  AllowOverride none
  Require all denied
</Directory>

DocumentRoot "/usr/local/apache2/htdocs"
<Directory "/usr/local/apache2/htdocs">
  Options Indexes FollowSymLinks Includes
  AllowOverride None
  Require all granted

  SetEnvIf X-Remote-User "(.*)" REMOTE_USER=$0
  SetEnvIf X-Remote-User-Name "(.*)" REMOTE_USER_NAME=$0
  SetEnvIf X-Remote-User-Email "(.*)" REMOTE_USER_EMAIL=$0
</Directory>

DirectoryIndex index.html
<Files ".ht*">
    Require all denied
</Files>

ErrorLog /proc/self/fd/2
LogLevel warn
LogFormat "%h %l %u %t \"%r\" %>s %b \"%{Referer}i\" \"%{User-Agent}i\"" combined
LogFormat "%h %l %u %t \"%r\" %>s %b" common
CustomLog /proc/self/fd/1 common

TypesConfig conf/mime.types
AddType application/x-compress .Z
AddType application/x-gzip .gz .tgz
AddType text/html .shtml
AddOutputFilter INCLUDES .shtml
user.shtml
<html>
<head>
<title>Hello User</title>
</head>
<body>
<p>Hello <!--#echo var=REMOTE_USER_NAME -->!</p>
<p>You authenticated as: <!--#echo var=REMOTE_USER --></p>
<p>Your email address is: <!--#echo var=REMOTE_USER_EMAIL --></p>
<p>Environment:</>
<p><!--#printenv -->!</p>
</body>
</html>
index.html
<html>
<head>
<title>Hello World</title>
</head>
<body>
<p>Hello world!</p>
</body>
</html>
Dockerfile
FROM httpd:2.4.54@sha256:c9eba4494b9d856843b49eb897f9a583a0873b1c14c86d5ab77e5bdedd6ad05d
# "Created": "2022-06-08T18:45:46.260791323Z" , "Version":"2.4.54"

RUN apt-get update \
  && apt-get install -y --no-install-recommends wget ca-certificates libcjose0 libhiredis0.14 apache2-api-20120211 apache2-bin\
  && wget https://github.com/zmartzone/mod_auth_openidc/releases/download/v2.4.11.2/libapache2-mod-auth-openidc_2.4.11.2-1.buster+1_amd64.deb \
  && dpkg -i libapache2-mod-auth-openidc_2.4.11.2-1.buster+1_amd64.deb \
  && ln -s /usr/lib/apache2/modules/mod_auth_openidc.so /usr/local/apache2/modules/mod_auth_openidc.so \
  && rm -rf /var/log/dpkg.log /var/log/alternatives.log /var/log/apt \
  && touch /usr/local/apache2/conf/extra/secret.conf \
  && touch /usr/local/apache2/conf/extra/oidc.conf

RUN echo "\n\nLoadModule auth_openidc_module modules/mod_auth_openidc.so\n\nInclude conf/extra/secret.conf\nInclude conf/extra/oidc.conf\n" >> /usr/local/apache2/conf/httpd.conf
gluu.secret.conf
OIDCClientID <inum-as-received-in-client-registration-response>
OIDCCryptoPassphrase <crypto-passphrase-of-choice>
OIDCClientSecret <as-provided-in-client-registration-request>
OIDCResponseType code
OIDCScope "openid email profile"
OIDCProviderTokenEndpointAuth client_secret_basic
OIDCSSLValidateServer Off
OIDCRedirectURI http://localhost:8111/oauth2callback
OIDCCryptoPassphrase <crypto-passphrase-of-choice>
<Location "/">
    Require valid-user
    AuthType openid-connect
</Location>
-
After, run an Apache container which will play the role of an application being protected by the authenticating reverse proxy.
docker run -dit -p 8110:80 \
       -v "$PWD/app.conf":/usr/local/apache2/conf/httpd.conf \
       -v "$PWD/index.html":/usr/local/apache2/htdocs/index.html \
       -v "$PWD/user.shtml":/usr/local/apache2/htdocs/user.shtml \
       --name apache-app httpd:2.4
Note that we are using a popular pre-built image useful for acting as a reverse proxy for authentication in front of an application. It contains a stripped-down Apache with minimal modules, and adds the mod_auth_openidc module for performing OpenID Connect authentication.
-
Make a test curl command call to ensure you get back some content as shown in the screenshot below
curl http://localhost:8110/user.shtml
Create an Authenticating Reverse Proxy Container#
We shall use Apache, but this time we use a Docker image that has mod_auth_oidc installed and configured. This proxy will require authentication, handle the authentication flow with redirects, and then forward requests to the application.
In order to use this, you will need to have registered a new OpenID Connect client on the Janssen server. We did that in the step 1 above
- Add the following files to the
testfolder.
oidc.conf
# Unset to make sure clients can't control these
RequestHeader unset X-Remote-User
RequestHeader unset X-Remote-User-Name
RequestHeader unset X-Remote-User-Email

# If you want to see tons of logs for your experimentation
#LogLevel trace8

OIDCClientID <inum-as-received-in-client-registration-response>
OIDCProviderMetadataURL https://idp-proxy.med.stanford.edu/auth/realms/med-all/.well-known/openid-configuration
#OIDCProviderMetadataURL https://idp-proxy-stage.med.stanford.edu/auth/realms/choir/.well-known/openid-configuration
OIDCRedirectURI http://localhost:8111/oauth2callback

OIDCScope "openid email profile"
OIDCRemoteUserClaim principal
OIDCPassClaimsAs environment

<Location />
   AuthType openid-connect
   Require valid-user

   ProxyPass http://app:80/
   ProxyPassReverse http://app:80/

   RequestHeader set X-Remote-User %{OIDC_CLAIM_principal}e
   RequestHeader set X-Remote-User-Name %{OIDC_CLAIM_name}e
   RequestHeader set X-Remote-User-Email %{OIDC_CLAIM_email}e
</Location>
proxy.conf
# This is the main Apache HTTP server configuration file. For documentation, see:
#   http://httpd.apache.org/docs/2.4/
#   http://httpd.apache.org/docs/2.4/mod/directives.html
#
# This is intended to be a hardened configuration, with minimal security surface area necessary
# to run mod_auth_openidc.

ServerRoot "/usr/local/apache2"
Listen 80

LoadModule mpm_event_module modules/mod_mpm_event.so
LoadModule authn_file_module modules/mod_authn_file.so
LoadModule authn_core_module modules/mod_authn_core.so
LoadModule authz_host_module modules/mod_authz_host.so
LoadModule authz_groupfile_module modules/mod_authz_groupfile.so
LoadModule authz_user_module modules/mod_authz_user.so
LoadModule authz_core_module modules/mod_authz_core.so
LoadModule access_compat_module modules/mod_access_compat.so
LoadModule auth_basic_module modules/mod_auth_basic.so
LoadModule reqtimeout_module modules/mod_reqtimeout.so
LoadModule filter_module modules/mod_filter.so
LoadModule mime_module modules/mod_mime.so
LoadModule log_config_module modules/mod_log_config.so
LoadModule env_module modules/mod_env.so
LoadModule headers_module modules/mod_headers.so
LoadModule setenvif_module modules/mod_setenvif.so
#LoadModule version_module modules/mod_version.so
LoadModule proxy_module modules/mod_proxy.so
LoadModule proxy_http_module modules/mod_proxy_http.so
LoadModule unixd_module modules/mod_unixd.so
#LoadModule status_module modules/mod_status.so
#LoadModule autoindex_module modules/mod_autoindex.so
LoadModule dir_module modules/mod_dir.so
LoadModule alias_module modules/mod_alias.so

<IfModule unixd_module>
    User daemon
    Group daemon
</IfModule>

ServerAdmin you@example.com

<Directory />
    AllowOverride none
    Require all denied
</Directory>

DocumentRoot "/usr/local/apache2/htdocs"
<Directory "/usr/local/apache2/htdocs">
    Options Indexes FollowSymLinks
    AllowOverride None
    Require all granted
</Directory>
<IfModule dir_module>
    DirectoryIndex index.html
</IfModule>
<Directory /opt/apache/htdocs>
    Options None
    Require all denied
</Directory>
<Files ".ht*">
    Require all denied
</Files>
ErrorLog /proc/self/fd/2
LogLevel warn
<IfModule log_config_module>
    LogFormat "%h %l %u %t \"%r\" %>s %b \"%{Referer}i\" \"%{User-Agent}i\"" combined
    LogFormat "%h %l %u %t \"%r\" %>s %b" common
    <IfModule logio_module>
      LogFormat "%h %l %u %t \"%r\" %>s %b \"%{Referer}i\" \"%{User-Agent}i\" %I %O" combinedio
    </IfModule>
    CustomLog /proc/self/fd/1 common
</IfModule>
<IfModule alias_module>
    ScriptAlias /cgi-bin/ "/usr/local/apache2/cgi-bin/"
</IfModule>
<Directory "/usr/local/apache2/cgi-bin">
    AllowOverride None
    Options None
    Require all granted
</Directory>

<IfModule headers_module>
    RequestHeader unset Proxy early
</IfModule>

<IfModule mime_module>
    TypesConfig conf/mime.types
    AddType application/x-compress .Z
    AddType application/x-gzip .gz .tgz
</IfModule>
<IfModule proxy_html_module>
Include conf/extra/proxy-html.conf
</IfModule>
<IfModule ssl_module>
SSLRandomSeed startup builtin
SSLRandomSeed connect builtin
</IfModule>
TraceEnable off
ServerTokens Prod
ServerSignature Off
LoadModule auth_openidc_module modules/mod_auth_openidc.so
Include conf/extra/secret.conf
Include conf/extra/oidc.conf
-
Edit the file to include the client secret for the client you created during DCR, and add a securely generated pass phrase for the session keys
docker build --pull -t apache-oidc -f Dockerfile . docker run -dit -p 8111:80 \ -v "$PWD/proxy.conf":/usr/local/apache2/conf/httpd.conf \ -v "$PWD/gluu.secret.conf":/usr/local/apache2/conf/extra/secret.conf \ -v "$PWD/oidc.conf":/usr/local/apache2/conf/extra/oidc.conf \ --link apache-app:app \ --name apache-proxy apache-oidc -
Now open a fresh web browser with private (incognito) mode, and go to this url
http://localhost:8111/user.shtml -
To check the proxy logs
docker logs -f apache-proxy -
To see the app logs
docker logs -f apache-app -
Should you modify the configuration files, just restart the proxy.
docker restart apache-proxy
Created: 2023-01-25